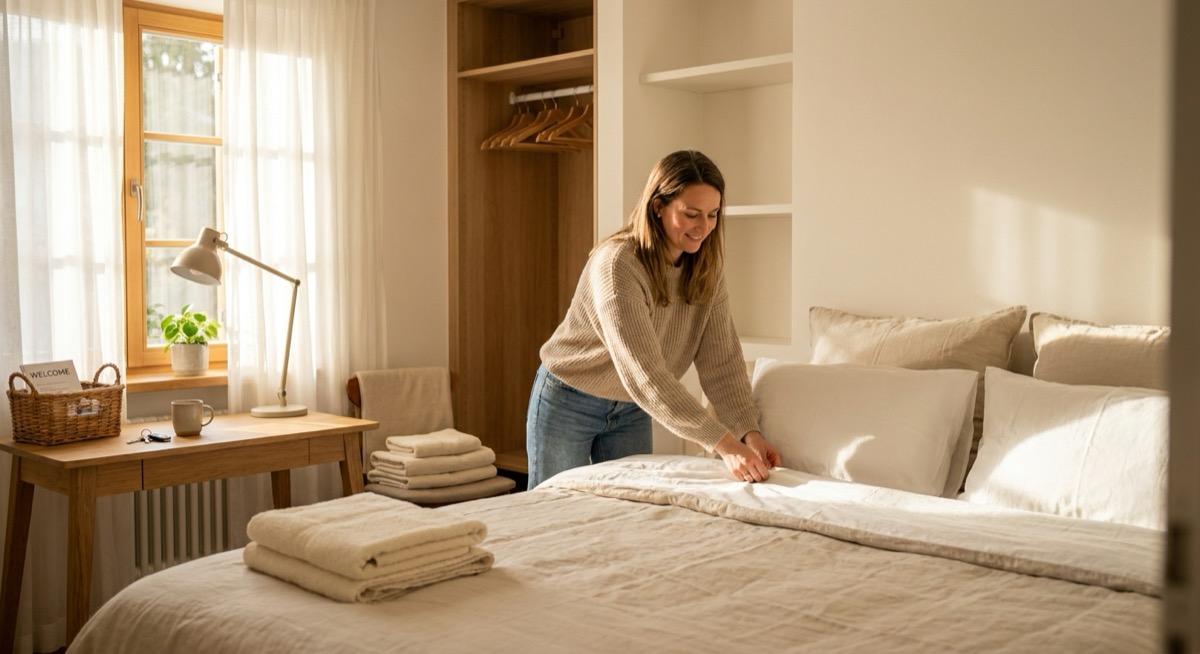
Rachel had been getting ready for six weeks. She'd painted the spare room a soft grey, bought a duvet set in Lucía's favourite colour, and left a hand-lettered "Welcome to the family!" sign on the pillow. Every friend who saw the photos said the same thing: that room is lovely.
Lucía landed on a Tuesday. By Thursday the loveliness had run out of road. There was nowhere to put an empty suitcase, so it lived on its side against the wall for the next eleven months. There was no desk, which meant that her online course — the one the programme requires — got done sitting on the bed with a laptop burning her knees. The room had a beautiful new blind that didn't block the streetlight, and no lock on the door, which Lucía was far too polite to mention.
The bigger problem wasn't the room at all. Rachel had assumed the Social Security appointment was something you sorted out "in the first week." It turned out you can't even apply until the au pair has been in the country long enough for their record to be validated, and the nearest office had nothing for eighteen days. Lucía spent almost three weeks in a new country with no bank account, no local phone plan, and no way to be paid except cash Rachel remembered to withdraw.
And on day two, both parents went back to work, leaving a jet-lagged twenty-two-year-old alone with a four-year-old and a house whose alarm code she'd been told once.
None of this was carelessness. Rachel had prepared the visible things beautifully and left the invisible ones to sort themselves out. This article is about the invisible ones: what actually has to be in the room, what belongs in a welcome pack, which appointments have to be booked before your au pair boards the plane, and what your own calendar needs to look like in week one.
🇺🇸 This guide is written for the US J-1 au pair programme. The room and welcome-pack advice is universal, but the admin timeline (Social Security, the state licence, the education requirement) is US-specific. We flag where other countries differ, and your agency's rules always take precedence over anything here.
Work Backwards From the Landing Date
Almost everything that goes wrong in week one is a scheduling problem, not a shopping problem. Appointments get booked slowly, furniture arrives slowly, and both parents have already used their flexible days by the time they realise they needed them.
Build the plan backwards from the arrival date instead of forwards from today.
| When | What you do |
|---|---|
| 6 weeks out | Confirm arrival date and flight; clear the room; order anything that ships slowly (bed, mattress, desk, wardrobe) |
| 4 weeks out | Ask your au pair about food, allergies, bedding preferences and phone situation; check your car insurance if they'll drive |
| 2 weeks out | Book the bank appointment; research the local Social Security office; check the state licence rules; block your own calendar for week one |
| 1 week out | Finish the room; assemble the welcome pack; do the food shop; write the week-one schedule; get the handbook printed |
| 48 hours out | Fresh bedding, towels, clear the bathroom shelf, charge the spare phone, cash for the first stipend, wifi password written down |
Key takeaway: The single most common pre-arrival mistake is treating week one as a buffer. It isn't. It's the most administratively loaded week of the entire year, and every appointment in it competes with a jet-lagged adult who can't yet drive, pay, or call anyone.
The Bedroom: What a "Private Room" Actually Has to Contain
Every programme requires a private bedroom. What almost none of them specify is what makes that room liveable for a young adult who will spend a year in it — sleeping, studying, video-calling home at odd hours, and retreating on their days off.
The non-negotiables
These aren't preferences. A room missing any of them will cause friction within a month.
- A proper bed, not a sofa bed or a child's single. Full-size where you can. This is a bed someone sleeps in for a year, not a guest bed.
- A door that locks from the inside. Some programmes require it and every au pair notices it. It signals that the room is genuinely theirs.
- A window with a real blackout option. Jet lag plus a streetlight is a fortnight of bad sleep.
- Storage for a full year of belongings. A wardrobe with actual hangers, a chest of drawers, and somewhere the empty suitcase can live out of sight.
- A desk and a chair. The education requirement means coursework happens in this room. A bed is not a desk.
- Independent temperature control. A fan, a radiator they can turn down, or at minimum a clear explanation of the thermostat.
- Reliable wifi. Test the signal in that room, not in the hallway. This is how they talk to their family.
What families reliably forget
The gap between a nice room and a functional one is usually five small things nobody thinks of until the au pair is already living there.
- A full-length mirror. They're getting dressed in an unfamiliar house, often for a night out.
- Bedside lighting and an accessible outlet. Phone charging next to the bed, not across the room.
- A waste basket and a laundry basket. Small, invisible until missing.
- Spare hangers and a couple of storage boxes. Suitcases empty faster when there's somewhere to put things.
- A power adapter for their plugs, ready on the desk on day one rather than discovered at 11 p.m.
What to spend on, and what to skip
| Worth the money | Nice if you have it | Genuinely skip |
|---|---|---|
| Good mattress and pillows | Small armchair or reading corner | Themed décor from their home country |
| Blackout blind or curtain | Kettle or mini fridge in the room | Repainting the whole room |
| Desk, chair and good desk lamp | Bluetooth speaker | A "welcome" sign in a language you don't speak |
| Lockable door and lockable drawer | Plants | Expensive bedding they didn't choose |
The temptation is to decorate. Resist it slightly. A room that's been styled to somebody else's taste is harder to make your own than a plain room with good bones. Leave a bare shelf and some empty wall — the photos and the flag from home want somewhere to go.
Key takeaway: Spend on the bed, the blackout, the desk, and the lock. Everything else is decoration, and decoration is the part your au pair would rather do themselves.
Agree what "their space" means before they arrive
The room stops being a furniture question the moment someone lives in it. Decide now, as a household, what your rules are: whether children may go in, whether you'll ever enter to clean or put laundry away, and what the expectation is around tidiness. Then say it out loud in the first week rather than discovering the mismatch through a closed door in month three. We've written about where those privacy and room boundaries usually blur.
The Welcome Pack: Small Things That Actually Land
A welcome pack isn't a gift basket. It's the set of objects that let someone function on day one in a country where they don't yet have a bank card, a phone plan, or a sense of direction.
On the bed when they walk in
Keep it small and useful. Four or five things beat a hamper.
- A local SIM or a phone they can use immediately — the single most valuable item in the pack
- A house key on a keyring they'll recognise, with the alarm code written down separately
- A transit card, pre-loaded, or the car keys and a note about where they park
- A one-page card with the essentials: home address, both parents' mobile numbers, wifi password, nearest hospital, and how to say the street name
- Something small and specific: a mug, a local snack, a paperback in their language. Personal beats expensive.
The paperwork half
The unglamorous part of the welcome pack matters more than the ribbon on it.
- A printed week-one schedule, so they know when they're working before their phone is set up
- The family handbook, printed or shared digitally, covering routines, house rules and the things you'll forget to say out loud
- The children's essentials on one page: allergies, medication, school times, who's allowed to collect them
- A simple map or pinned list: the pharmacy, the supermarket, the gym, the bus stop, the nearest place to get a coffee alone
That handbook is doing a lot of work in week one, and it's the thing families most often start and never finish. If yours doesn't exist yet, our guide to what belongs in an au pair family handbook is a faster route than a blank document.
Ask three questions before you buy anything
A message four weeks out saves most of the guesswork and costs nothing:
- Food: anything you don't eat, can't eat, or would love to find in the fridge?
- Bedding and towels: do you want to bring your own pillow? Any allergies to duvets or detergent?
- Phone: is your handset unlocked, and do you want us to sort a SIM before you land?
Key takeaway: The best welcome pack item is not sentimental. It's a working phone. Everything else in the first week — directions, translations, calling home, telling you they've landed — depends on it.
The Appointments You Book Before They Land
This is the part of arrival prep that families underestimate every single time. Several of these steps are sequential: one can't start until another has cleared, and if you begin the chain in week two, you'll finish it in week five.
🌍 Country-specific section. The steps below are the US J-1 sequence. Germany, the UK and France have entirely different first-week admin — in Germany, for instance, it's the Anmeldung at the residents' registration office, health insurance enrolment, and a bank account, with no equivalent of the SSN wait.
The US sequence, in order
| Step | Timing | Who arranges it |
|---|---|---|
| SEVIS record validated | Usually within a few days of arrival | Agency or local coordinator |
| Social Security number | Apply only after the record is validated — typically around 10 days after arrival; card follows by post | Host family drives; au pair applies in person |
| Bank account | Once the au pair has ID and an address; some banks will open without the SSN, some won't | You book the appointment |
| Phone plan | Day one or two if you didn't pre-buy a SIM | Host family, usually as a line on their plan |
| State driver's licence or ID | After the SSN, if they'll drive; rules vary sharply by state | Host family books the test slot |
| Education requirement | Register for the semester's classes early; seats fill | Au pair, with your help on scheduling |
| First cluster meeting | Whenever the coordinator schedules it | Local coordinator |
Two things about this table are worth internalising. First, the Social Security step gates several others, so the appointment is the one to research before your au pair has even packed. Second, the driving licence is far more variable than families expect: some states will issue quickly on a foreign licence plus the SSN, others want a written test, a road test, and a wait.
The full walkthrough of that first-week paperwork run — what to bring, what goes wrong, and how to keep an au pair paid in the meantime — is in our guide to SSN, bank account and phone setup.
Have a plan for money in the gap
Your au pair will be owed a stipend before they have anywhere to put it. Decide in advance: cash for the first two or three weeks, a written note of what you've paid, and a switch to transfer once the account opens. Improvising this is how the first money conversation of the year becomes an awkward one.
Block Your Own Calendar Before You Do Anything Else
The most expensive preparation mistake has nothing to do with the house. It's assuming that childcare starts on day two.
The first-three-days rule
US programme rules require a host parent — or another responsible adult — to be at home with the au pair for the first three days after arrival. It exists for a reason: it's the window in which someone learns your locks, your car seats, your school run and your children's names, with an adult in the building.
Treat it as a floor, not a target. Nobody has ever regretted taking a fourth day.
- Day 1: Airport, home, room, food, sleep. Nothing else. Jet lag is real and a tour they can't remember is wasted.
- Day 2: House tour with the kids present, neighbourhood walk, phone and paperwork, first proper family meal.
- Day 3: Shadow the actual routine — school run, nap, snack, pickup — with you doing it and them watching.
- Day 4 onwards: Swap. They run it, you're in the house.
- First solo stretch: Short, in daylight, and somewhere you can get back from in twenty minutes.
Check the driving assumption early
If your schedule depends on your au pair driving, check the local licence rules before arrival, not after. A family whose entire school run assumes a driver, hosting an au pair who can't legally drive for six weeks, is a genuinely difficult six weeks. Our guide to driving rules, insurance and the family car covers what to confirm with your insurer.
Key takeaway: Book your own time off before you book anything else. A perfect bedroom cannot compensate for an empty house on day two, and the three-day rule is the minimum, not the plan.
Getting the Rest of the House Ready
The bedroom gets the attention; the shared spaces cause the friction. Spend an hour on these and you'll skip a month of small negotiations.
Bathroom and laundry
- Clear an actual shelf, not a corner of one, plus a hook and towels in their own colour
- Show them the machine on day two, including which cycle for the kids' clothes and where detergent lives
- Say the shower rule out loud if there is one — timing, hot water limits, who needs the bathroom at 7:15
Kitchen and food
- Shop for what they actually eat, using the answers from your four-week message
- Explain the food rules plainly: what's shared, what's off limits, whether they buy their own snacks or add to the list
- Give them a shelf in the fridge and one in a cupboard that is theirs
Keys, codes and safety
- Keys, alarm codes and garage remote, handed over on day one and written down somewhere they can find them
- A walk-through of the practical house: stopcock, fuse box, thermostat, bin day, which door sticks
- Emergency contacts posted physically, not just messaged — our emergency preparedness guide covers what belongs on that list
Setting up a room and a welcome pack generates a run of receipts nobody thinks to track — bedding, a desk, a SIM, the transit card, the first cash stipend. Logging them as you go in a shared tool like AuPairSync keeps the setup spend visible and, more usefully, keeps the "did we pay you back for the bus card?" questions from piling up into a vague debt neither of you can reconstruct in October.
What Pre-Arrival Setup Typically Costs
Budgets vary enormously by what you already own. These are typical US ranges for a family furnishing a room close to bare, and they're worth knowing before you're three purchases in.
| Item | Typical range | Notes |
|---|---|---|
| Bed, mattress, bedding | $300–800 | The one place not to economise |
| Desk, chair, lamp | $100–250 | Required in practice by the education requirement |
| Storage, mirror, blackout blind | $80–200 | The forgotten category |
| Phone line or prepaid SIM | $20–50/month | Usually added to the family plan |
| Transit card or fuel allowance | $50–120/month | Varies hugely by city |
| Welcome pack and first food shop | $50–150 | Small items, high return |
Costs change and vary by region. These ranges reflect typical US setup costs at the publish date and exclude programme fees, the weekly stipend and the education contribution. Our full cost breakdown covers the recurring side.
The Pre-Arrival Checklist
If you do nothing else on this page, do these ten things in this order.
- Block your calendar for the first three days minimum, before you buy a single thing.
- Order slow items six weeks out — bed, mattress, desk, wardrobe.
- Message your au pair four weeks out about food, bedding and their phone.
- Research the Social Security office and the state licence rules while they're still packing.
- Book the bank appointment for the first week you realistically can.
- Finish the room a week early, then sleep in it one night yourself. You'll find what's missing.
- Assemble the welcome pack: phone or SIM, keys, transit card, essentials card, one personal thing.
- Write the week-one schedule and print it, along with the handbook and the kids' one-pager.
- Plan the money gap — cash amounts, written record, switch to transfer when the account opens.
- Do a final 48-hour pass: fresh bedding, cleared bathroom shelf, charged phone, wifi password on the desk.
From there, the baton passes to the day itself. The airport pickup and first 48 hours has its own rhythm, and the week that follows is covered in our first-week survival guide.
The Bigger Picture
There's a version of this preparation that's really about control — the immaculate room, the laminated schedule, the year planned to the hour. That's not what any of this is for.
What you're actually doing in these six weeks is removing every small humiliation from someone's first fortnight. Not having to ask where to put a suitcase. Not having to borrow money. Not having to guess whether it's alright to open the fridge. A young adult who has flown across the world to look after your children will spend the first two weeks quietly working out what's allowed, and every question you answer before they have to ask it is one less thing they'll be too polite to raise.
Rachel's room really was lovely. What Lucía remembered, a year later, was something smaller: a working phone on the pillow, and a note with the wifi password on it, so that the first thing she could do in a strange country was tell her mother she'd arrived.
Getting ready for your au pair's arrival? Download AuPairSync to keep the setup checklist, the first-week schedule and the arrival expenses in one place both of you can see.