Time Off Requests: How to Request, Approve & Track Au Pair Leave
Vacation days, sick days, a weekend visit from family back home — time off is part of every au pair year. AuPairSync gives you a simple request-and-approve workflow so nothing falls through the cracks: your au pair submits a request, you review it, and the approved days land on the shared calendar automatically.
What You'll Learn
In this guide, you'll see how to:
- Submit a time-off request (au pair)
- Review and approve or deny requests (host parent)
- Track upcoming and past time off
- See approved time off on the dashboard and calendar
Where to Find Time Off
Time off lives in two places:
- Dashboard — A "Time Off" section appears whenever there's a pending request, so you never miss one.
- More Menu → Time Off — The full list of all requests (pending, approved, and denied).
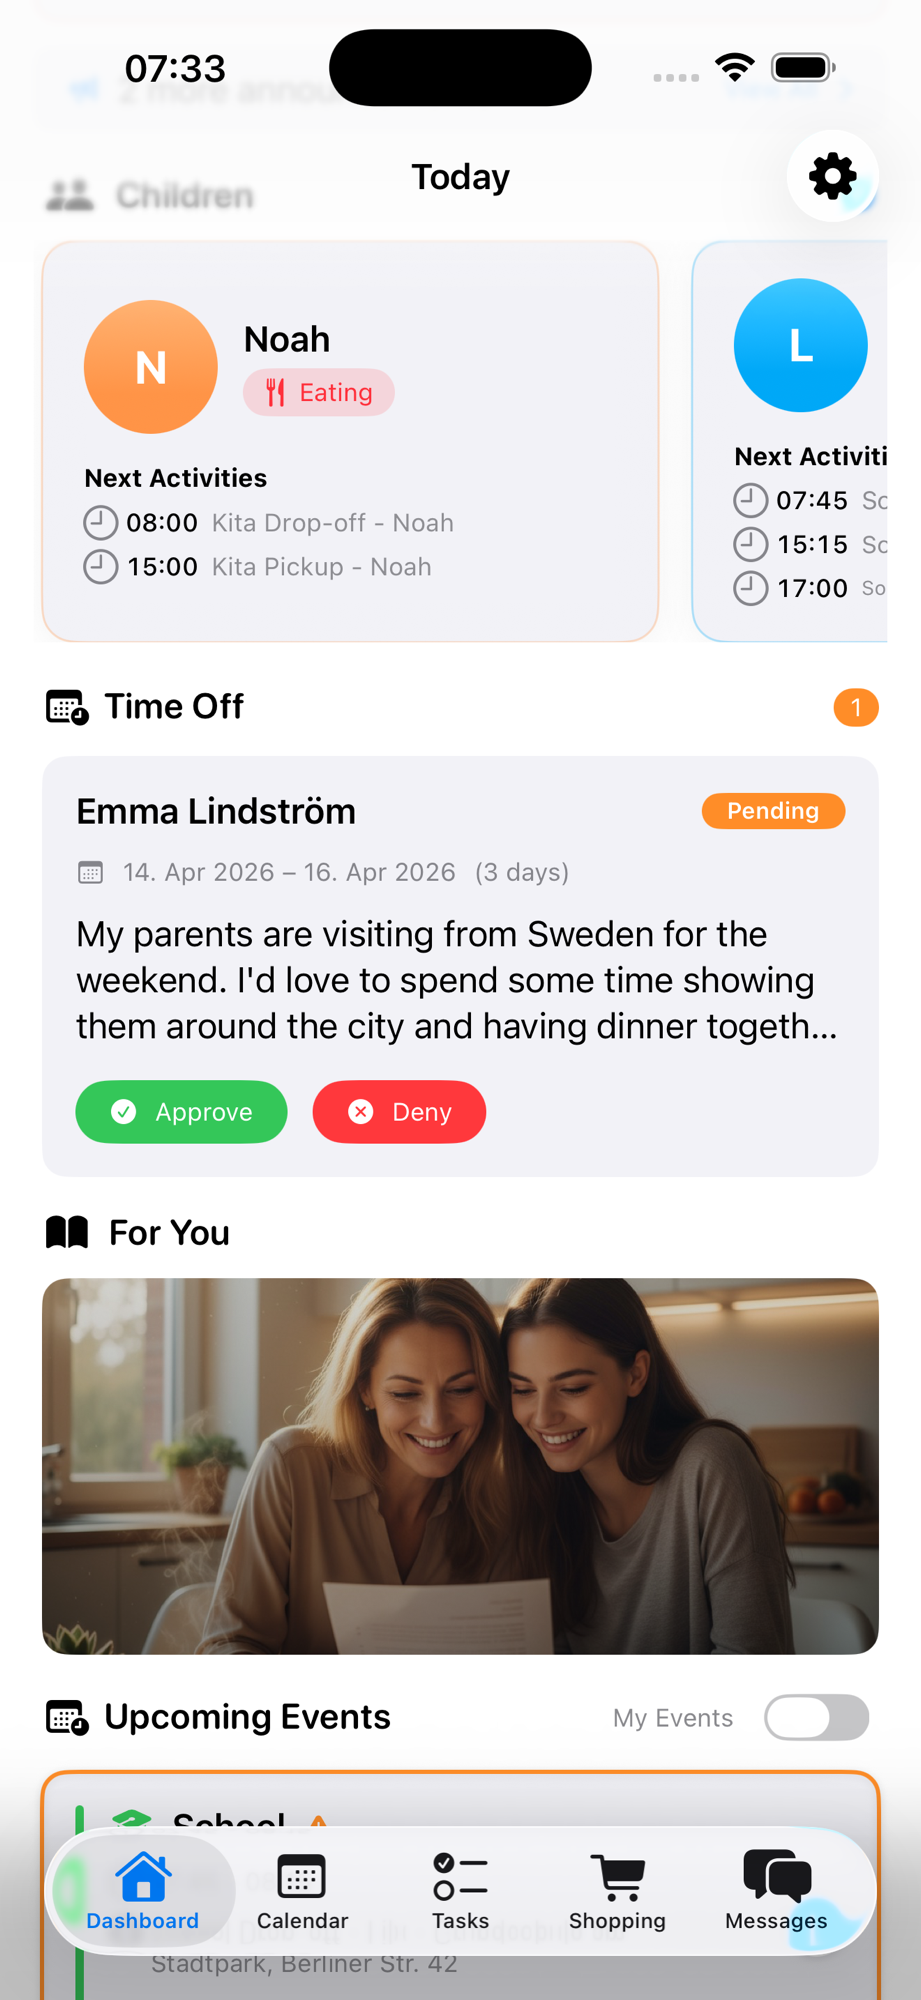
Pending requests surface directly on the dashboard with Approve and Deny buttons, so the host parent can act without navigating anywhere else.
Step 1: Submitting a Request (Au Pair)
When your au pair needs time off, they open More Menu → Time Off and tap the + button.
The request form asks for three things:
- Start date — the first day off (today or any future date)
- End date — the last day off (can be the same day for a single day off)
- Reason — a short explanation of why they need the time
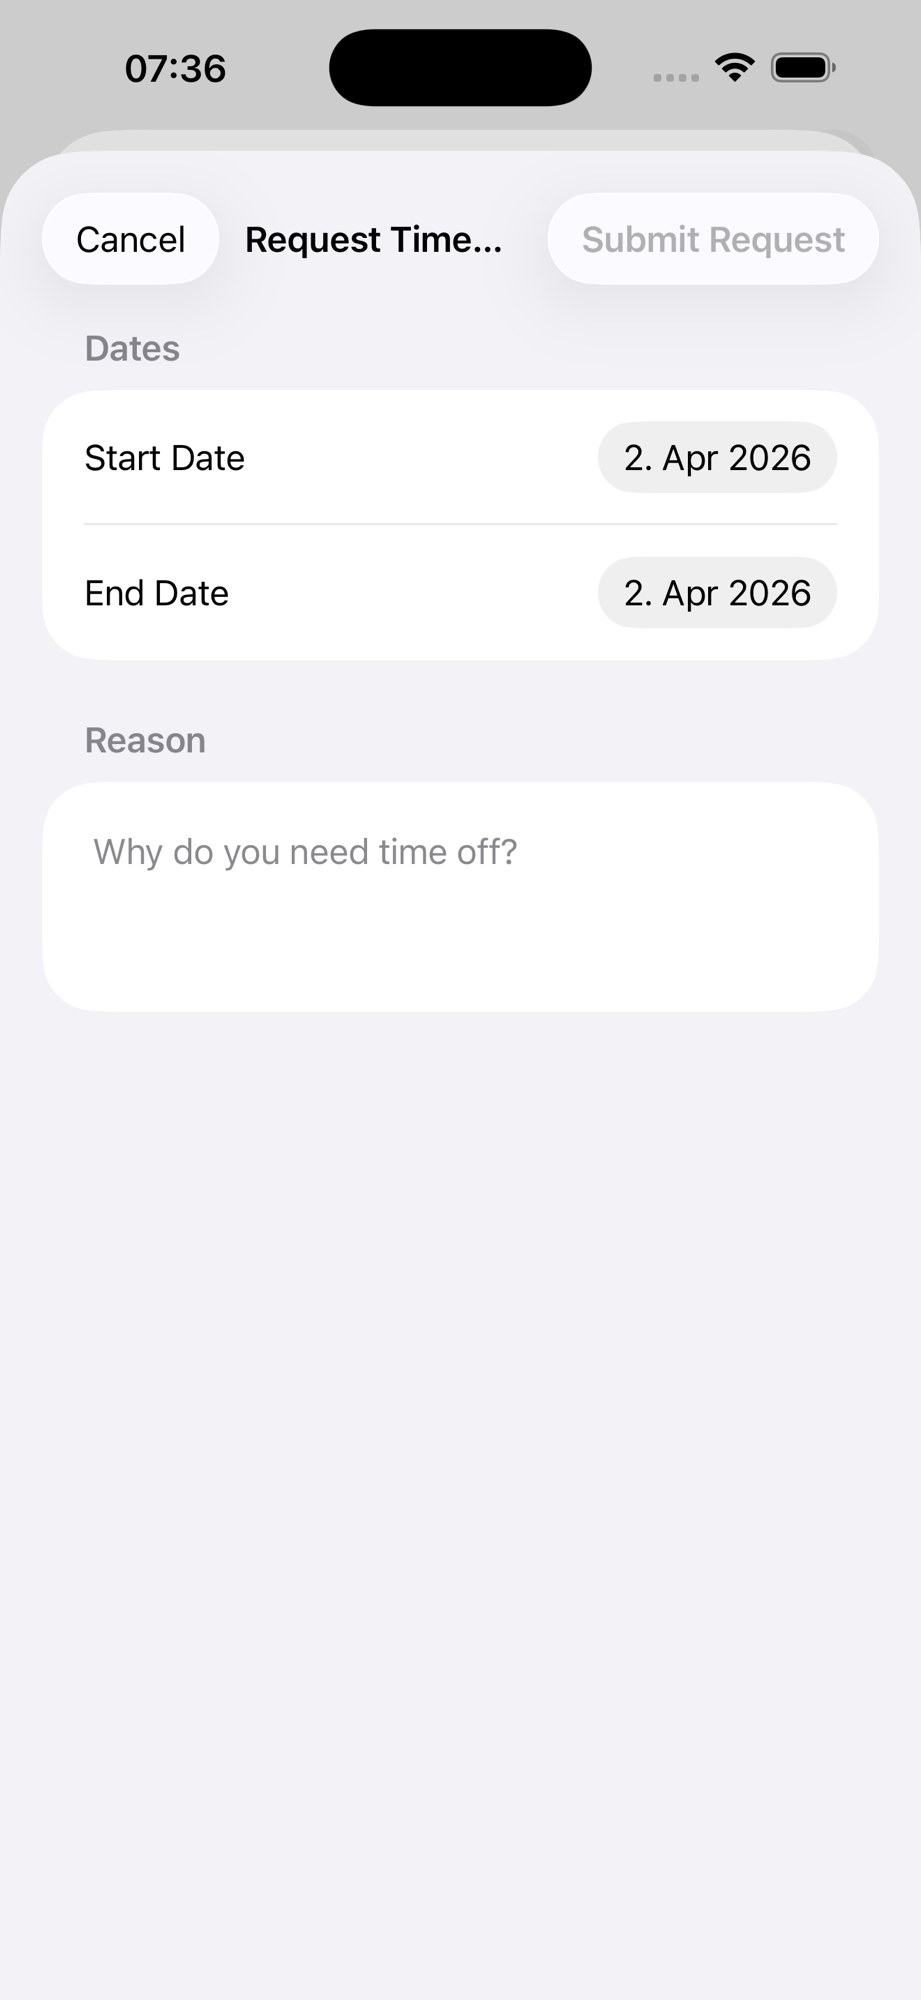
The app automatically calculates the duration and shows it on the request card. Requests can be up to 30 days long.
Tip: Encourage your au pair to include context in the reason — "My parents are visiting from Sweden" is much easier to approve than "Personal." It also helps when you're planning coverage.
Once submitted, the request appears as Pending for both the au pair and the host parents.
Step 2: Reviewing a Request (Host Parent)
When a request comes in, host parents see it in two places:
On the Dashboard
The Time Off section shows a badge with the number of pending requests. Each card displays the au pair's name, dates, duration, reason, and two action buttons:
- Approve (green) — opens the approval sheet
- Deny (red) — opens the denial sheet
In the Time Off List
Tap into More Menu → Time Off to see the full list, organised into sections:
- Pending Requests — waiting for your decision
- Approved — confirmed time off
- Denied — declined requests

Step 3: Approving or Denying
Tap Approve on any pending request to open the review sheet. It shows a summary of the request at a glance:
- Dates — start and end date
- Duration — number of days
- Reason — the full explanation from your au pair
Below the summary, there's an optional Message field where you can add a note — "Have a great time with your parents!" or "Could we adjust to start on the 15th instead?"
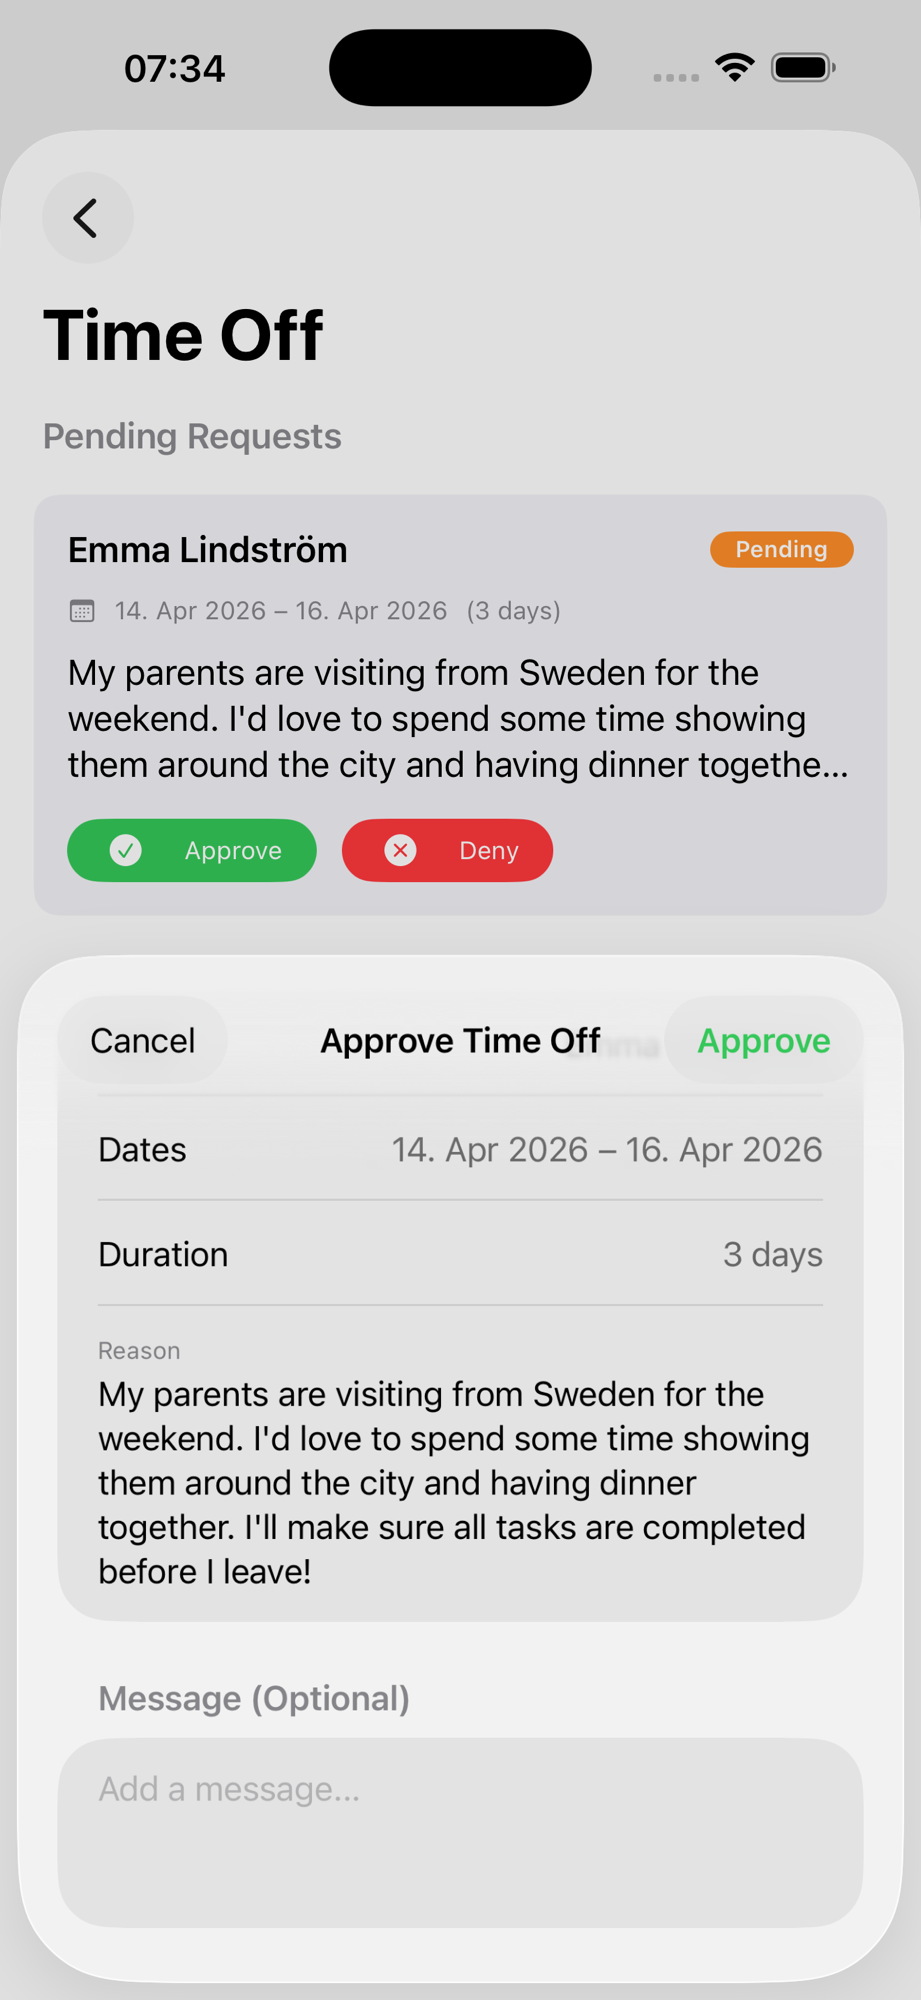
Tap Approve to confirm. The request immediately moves to the Approved section, and the status badge turns green.
Denying works the same way — tap Deny, optionally add a reason ("That week is difficult because of the school play — could we shift by a few days?"), and confirm.
Key point: Whether you approve or deny, always respond promptly. Your au pair can't make travel plans while a request sits in limbo. Aim to respond within 48 hours.
Step 4: What Happens After Approval
Once approved, the time off appears in three places:
- Time Off list — the card shows a green "Approved" badge
- Shared calendar — an all-day event is automatically created for the approved dates, visible to the entire family
- Dashboard — upcoming approved time off remains visible so everyone can plan ahead

Your au pair can see the approval status instantly — no need to ask "Did you see my request?"
Managing Requests
Editing a Request
Au pairs can edit their own pending requests — swipe left on the card to reveal the edit option. Once a request is approved or denied, it can't be edited (submit a new one instead).
Deleting a Request
Both au pairs (their own requests) and parents can delete requests by swiping left. Use this for duplicate or mistaken submissions.
Denied Requests
Denied requests stay visible in the list so there's a record. If the au pair wants to request different dates, they simply submit a new request.
Best Practices
- Set expectations early — Agree on notice periods in your house rules: 2 weeks for vacation, 48 hours for a personal day.
- Respond quickly — A pending request means your au pair is waiting. Even a quick "Seen it, checking coverage" helps.
- Use the message field — A short note with your approval ("Enjoy Barcelona!") goes a long way.
- Check the dashboard regularly — Pending requests surface there so you don't miss them, but don't let them sit.
- Encourage requests — An au pair who never asks for time off may be afraid to. Proactively check in.
Related Guides
Learn More
- Au Pair Time Off: How Much, How to Ask, and How to Plan Around It — An in-depth guide to time-off rules, coverage planning, and handling conflicts
- The Ultimate Au Pair Schedule — Plan working hours, days off, and routines
Ready to streamline time-off requests? Download AuPairSync and handle requests, approvals, and coverage — all in one place.
Ready to simplify your au pair life?
Tasks, calendar, messaging and more — all in one app.

Related Articles

How to Set Up Your Family Dashboard
Complete walkthrough for setting up and customizing your AuPairSync family dashboard. Learn how to configure widgets, organize information, and create your family's command center.
6 min read

Managing Tasks with Photos and Context
Learn how to create clear, visual task assignments using photos and detailed context. Make task completion easier for your au pair with step-by-step visual guides.
7 min read

Coordinating Schedules with the Shared Calendar
Master family schedule coordination using AuPairSync's shared calendar. Learn best practices for managing events, avoiding conflicts, and keeping everyone in sync.
6 min read